|
 |

|
Please note that the pattern stamp has its own page.
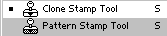
The clone stamp, and pattern stamp tools are grouped together
in the toolbar. Click on the one which is showing to see
the pop-up menu, and choose the one you want. Or you choose
the one you want by clicking its button on the shared options
bar.
With the clone stamp tool (formerly known as the rubber
stamp tool), you can copy, or clone copies of a portion
of an image and paint them onto any other part of the image.
The size of the area copied depends on the brush size you
select from the brushes pop-up menu on the tool’s options
bar. How the copy merges with the new area is determined
by the choices you make on the options bar [see below].
Hold down the Alt key while clicking to pick up, or copy
the image data you want to transfer. Then move the pointer
to where you want to apply that data and click, or click
and drag. A cross-hair will appear to indicate where you
are copying from. When you start painting, the cross-hair
will be at the spot where you Alt-clicked. Depending on
whether you chose Aligned in the options bar, the cross-hair
will parallel your strokes, or return to that original spot
after each release of the mouse button.
Be aware that if you have added adjustment layers or have
a stack of layers with a variety of blend modes above the
layer that you want to clone to, your clones will be all
wrong. You need to turn off adjustment layers or blends
other than Normal at lowered opacity (turn off visibility
by clicking the eyeball icon at the left end of those layers)
while your are doing your cloning. Turn them back on once
you are done.
Note - if your Alt key does not appear to be working
in Elements, you may have another program running in the
background that has taken over that key. GuruNet (Atomica)
and FlySwat are two such applications. Uninstall them, or
reassign the hot key in those programs to regain use of
the Alt key in Elements.
You can use the clone, and pattern stamp tools to copy
data between different images, as well as within the same
image.
A shortcut to change brush sizes while using any of the
paint tools, including the clone stamp tool, is to press
the left bracket [ to decrease brush size, or the right
bracket ] to increase brush size.
The keyboard shortcut for the clone and pattern stamp tools
is the letter S.
|
The illustration below, is the clone stamp tool’s options
bar (split in two because it’s so long). The stamp icon on the
left is the clone stamp. The one on the right (with the little
checkerboard next to it) is the pattern stamp.
To choose a brush size and type, click on the brush stroke thumbnail.
A pop-up palette of available brushes will appear. For more information
on brushes, please see the Brushes page.
The box titled Mode, and showing Normal is a drop down
menu of all the blend modes.
The Opacity setting determines how transparent the copied
image portions will be when reapplied. A setting of 100 % is completely
opaque. 0 % is completely transparent. Type a value in the text
box, or access a slider by clicking on the arrow at the right
side of the box.
If you have Aligned checked, your clones will
be applied as if you were working with a copy of the image that
has been displaced the distance of your first stroke after Alt-clicking.
All subsequent strokes (prior to another Alt-click) will fill
in the copied image relative to that first stroke. When you do
not have Aligned checked, all (separate) strokes after an Alt-click
will apply from the single spot that you Alt-clicked. Each time
you end one stroke and make a new one, the new one will use the
same starting spot (your Alt-click location). Thus you can repeatedly
apply the same image data (the Alt-click location) to different
spots.
Note that double-clicking when you are Alt-clicking will turn
Aligned on if you have it off. I do this all the time by mistake
(I use a stylus). This can be a real nuisance since it makes a
mess if you think you have it off when it’s on. I want it to be
off (not aligned) and stay off.
Use All Layers is a valuable option that you
should take advantage of whenever possible. When it is turned
on, you can add an empty layer above your image and do your cloning
on that layer. This allows you to clone without changing your
base image; you can use the eraser to correct mistakes, or delete
the entire layer if you don’t like what you have done. If you
do not have this option checked, you must clone on the image itself,
and clone/sample data will be copied only from that layer.
Right-clicking on the image when the clone tool has been selected
in the toolbox will cause the brushes
pop-up palette to appear next to your cursor. Press Enter or click
on your document’s blue title bar to close the pop-up palette.
If you have doodled with a tool’s options and want to get back
to the default settings, click that tool’s icon at the far left
end of its options bar. Choose either Reset Tool to reset only
the current tool, or Reset All Tools to restore default settings
to every tool.
Please note that all descriptions, and illustrations featured
refer to files which are in Photoshop’s .psd format, and which
are in RGB color mode. Other file formats, and color modes may
generate different options. Some Photoshop features are not available
for images not in .psd format, or RGB color mode. To find what
color mode your image is in, choose Image > Mode.